Like the majestic mountain structure it's named after, Apple's latest version of OS X, El Capitan, goes a little deeper to expand on the foundation laid by Yosemite. While the update may not be as monumental as some have hoped, it is an improvement and includes tons of useful new features you don't want to miss.
- Don't Miss: How to Use Split View Mode on El Capitan
To help you get accustomed to Mac OS X 10.11 and take advantage of its new features, here's a list of some tricks and tips that you'll want to start using today.
1. Bypass the Trash When Deleting Files
Although I've never had an issue with entering the Trash to fully delete files, in El Capitan you can "Delete Immediately"—meaning that you can skip the Trash step if you want to.

Method 1: Use the Menu Bar
- Open Finder.
- Highlight the file you want to delete.
- In the menu bar, select File.
- In the tab, hold down Option, then select "Delete immediately."
- Confirm by pressing "Delete" on the popup.
Method 2: Use a Keyboard Shortcut
With your file selected, use the keyboard shortcut Option + Command + Delete. Confirm by pressing "Delete" on the popup. Again, this will delete the file immediately, so make sure that's what you want to do.
2. Auto-Hide the Menu Bar
Hiding the menu bar is a quick trick that'll help make your screen feel a little more immersive. To do this, enter System Preferences -> General, then check the box next to "Automatically hide and show the menu bar."

With your menu bar gone, all you need to do is hover over it with the cursor to get it back into view, just like you would with your Dock (if you have it hidden).
3. Customize Safari Reader
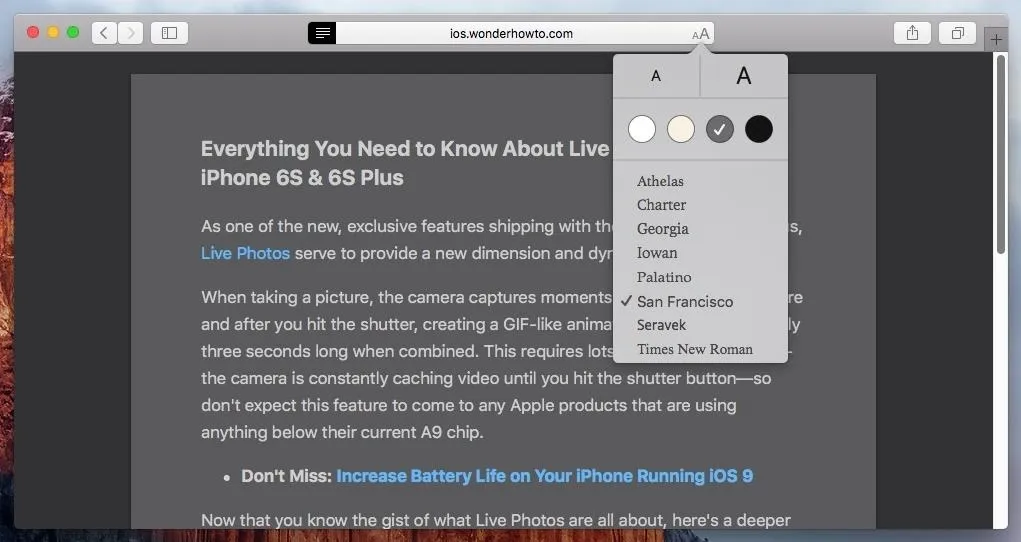
Using Safari Reader is great for removing ads and additional bloat from particular webpages. El Capitan improves on this by adding additional customization options, like adjusting the background color or selecting a different font style.
4. Quickly Mute Safari Tabs
Much like the Chrome flags trick that let you mute individual tabs, El Capitan's Safari has a similar feature with an additional option. The first method is by locating the tab playing audio and clicking on the speaker icon within that tab.

If you have too many tabs open and can't find the tab playing audio, then go into the address bar of any tab and click the now-visible speaker icon.

5. Double-Click Windows to "Zoom"
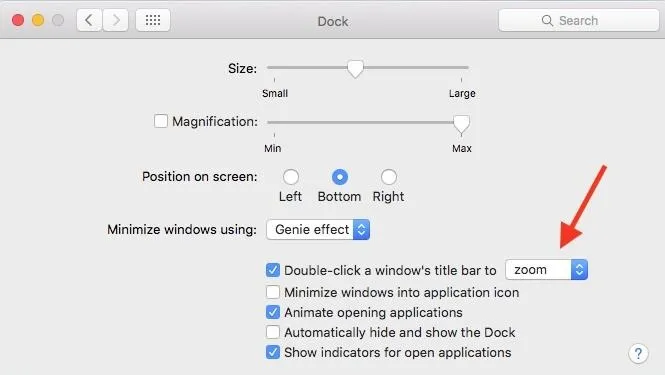
On Yosemite, in System Preferences -> Dock, there was an option to "Double-click a window's title bar to minimize" the window into the Dock. If it wasn't checked, the action would instead expand the window (or return to standard view).
In El Capitan, Apple clarified what action you have enabled with a drop-down box for "minimize" and "zoom." And if you leave it unchecked, double-clicking a title bar won't do anything (though, in some apps it will still expand, as in Chrome).
6. Pin Safari Tabs
When you have too many tabs open in Safari, the pinning feature is extremely useful. To pin, enter the tab, go to Window in the menu bar, then select "Pin Tab." Alternatively, you can just right-click the desired tab and select "Pin Tab," which is faster.

7. Move the Spotlight Window (Finally!)
A petty issue I previously had on OS X was the inability to move the Spotlight Search window that remained perfectly centered on my screen. With El Capitan, you can finally move it around like any other window, thankfully. To move the Spotlight window back to its default spot, click and hold on the magnifying glass icon in the menu bar.

8. Get Useful Info from Spotlight Search
In addition to finally being able to move the Spotlight window around, you can now use Spotlight to get weather info just by typing in something like, "Weather in Santa Monica."

And If you want to catch up on your favorite sports team's scores, you can do that, too. You'll also be able to view their remaining schedule.

9. Shake to Find Your Cursor
Whenever your cursor mysteriously disappears on the screen, instead of clicking around to try and find where it's at, you can now shake your computer mouse a little bit to make the cursor icon expand to a larger image, which is easily spotted. If you don't like this feature, it can be disabled in System Preferences -> Accessibility -> Display.


10. Add Third-Party Extensions to the Photos App
If the Photos app doesn't give you enough tools to edit your pictures the way you want, El Capitan now lets you use third-party extensions in order to provide the additional tools you want. More info here.

11. Switch Tabs with Keyboard Shortcuts
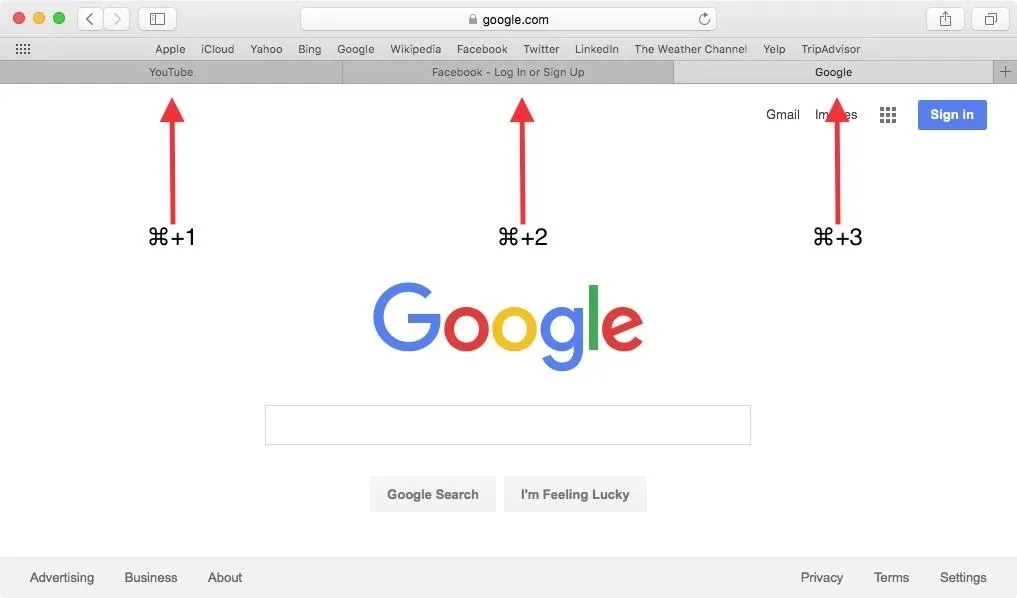
Without having to take your hands off the keyboard, El Capitan enables you to use simple shortcuts to switch to a specific tab. Use Command + the tab number you want to switch to.
12. Add URLs to Your Notes
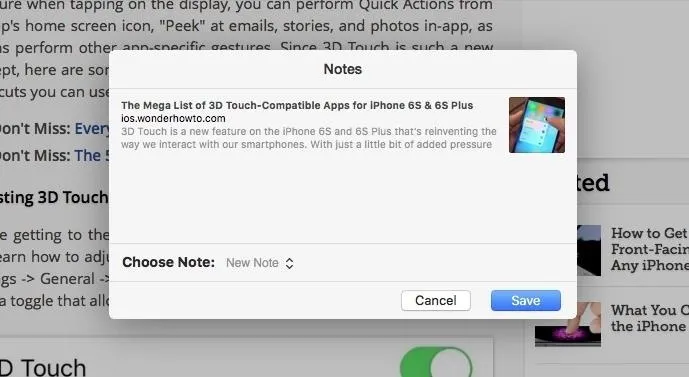
If you come across a web page you want to include in a note, then go ahead and do it. Using the share sheet in Safari, you can now select Notes to create a new note or add the URL to an existing one.
13. Remember Web Pages
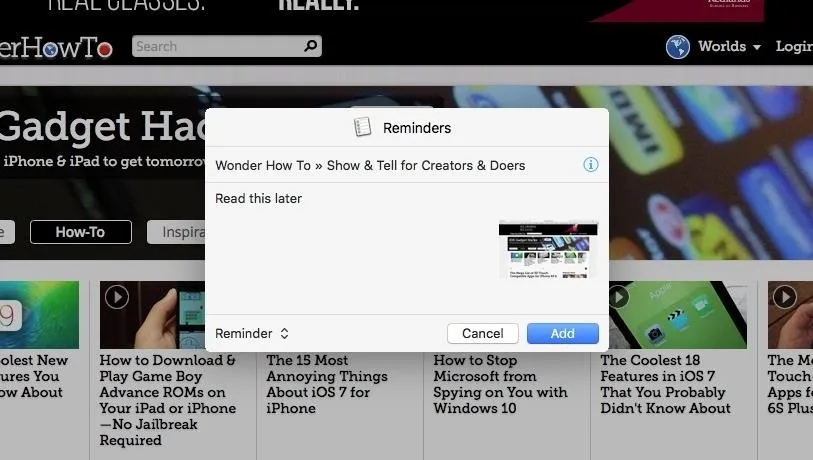
Safari now lets you use the share sheet to include web pages within a note, but you can also use the share sheet to create Reminders out of a particular web page you want to remember to read later.
14. Tag Faces in Photos
When looking at a photo in the Photos app, use the information icon (next to the heart icon) to tag faces. Using this will make it easier to locate them in the Photos app or within a Spotlight search.

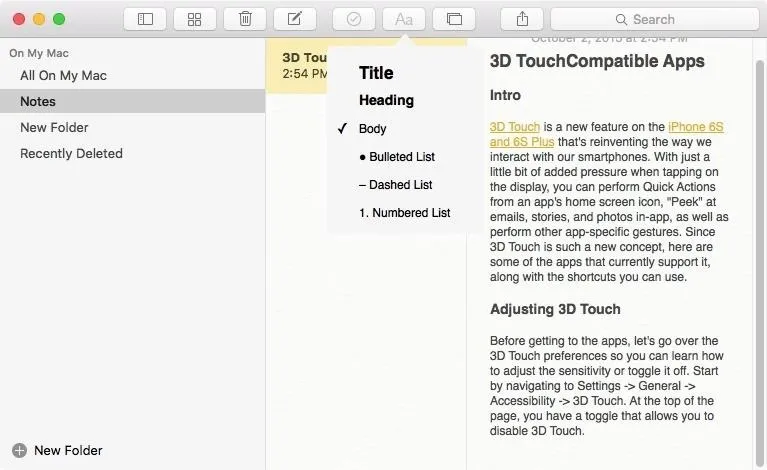
15. Use Titles & Headings in Notes
Although you could manually create titles and headers in previous versions of the Notes app, El Capitan now makes it easier by including these additional formatting tools. Just click the "Aa" icon to bring up the new options.
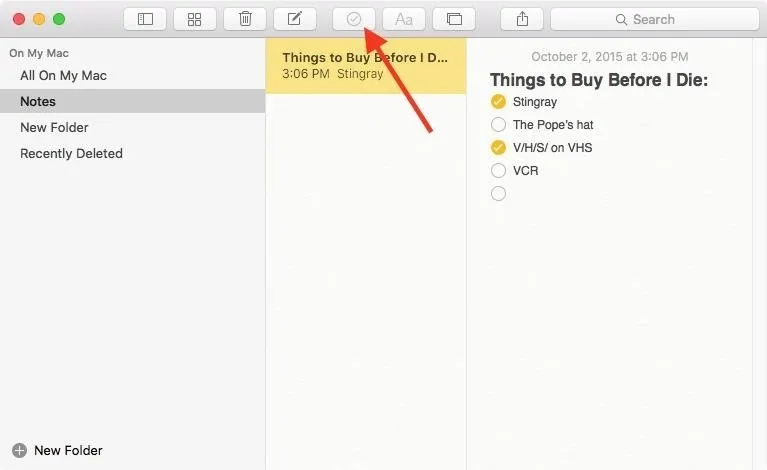
16. Create a Checklist in Notes
Like iOS 9, El Capitan has also brought us the ability to create checklists in notes. Using the checklist icon, add items to your list and mark them off as they're completed or collected.
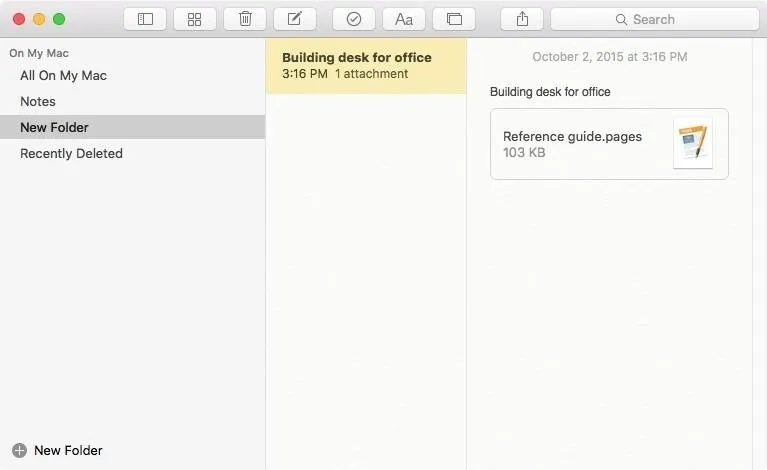
17. Add Attachments to Notes
In addition to being able to add URLs to your notes, you can also easily drag and drop documents into the Notes app.
18. Secure iCloud with Two-Factor Authentication
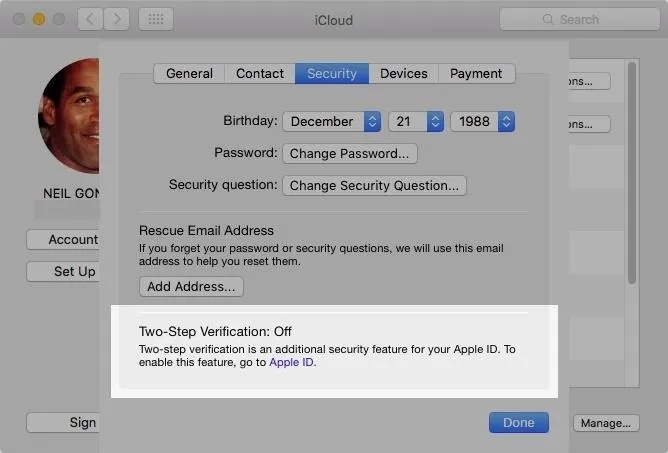
If you want to beef up your iCloud security, then you'll definitely love what you can now do with El Capitan and iOS 9. Using two-factor authentication, a six-digit PIN will be required before signing into your iCloud account on a new device or browser. Although this feature is still rolling out, you can find the setting under System Preferences -> iCloud -> Account Details -> Security.
19. Change Your App Store Security Preferences
Like iOS 9, El Capitan also allows you to save your password for the App Store, preventing you from having to enter it every time you want to download a free app. Find the option under the App Store preferences.

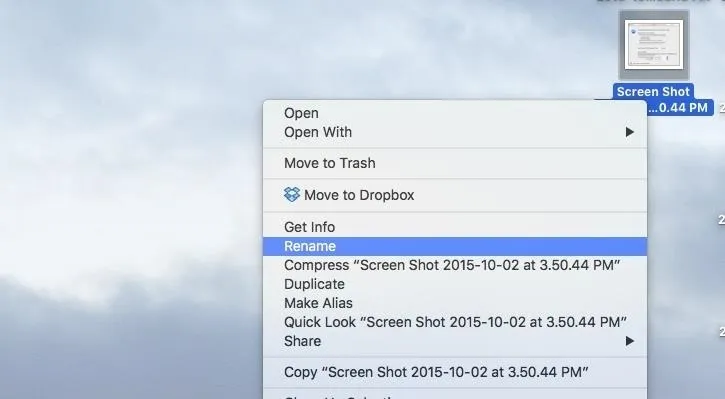
20. Rename Files from the Contextual Menu
Performing a slow double-click to rename a file isn't a huge hassle, but for those of us who want to get it done faster, we can now rename files from the contextual menu.
21. Track Flights from Almost Anywhere
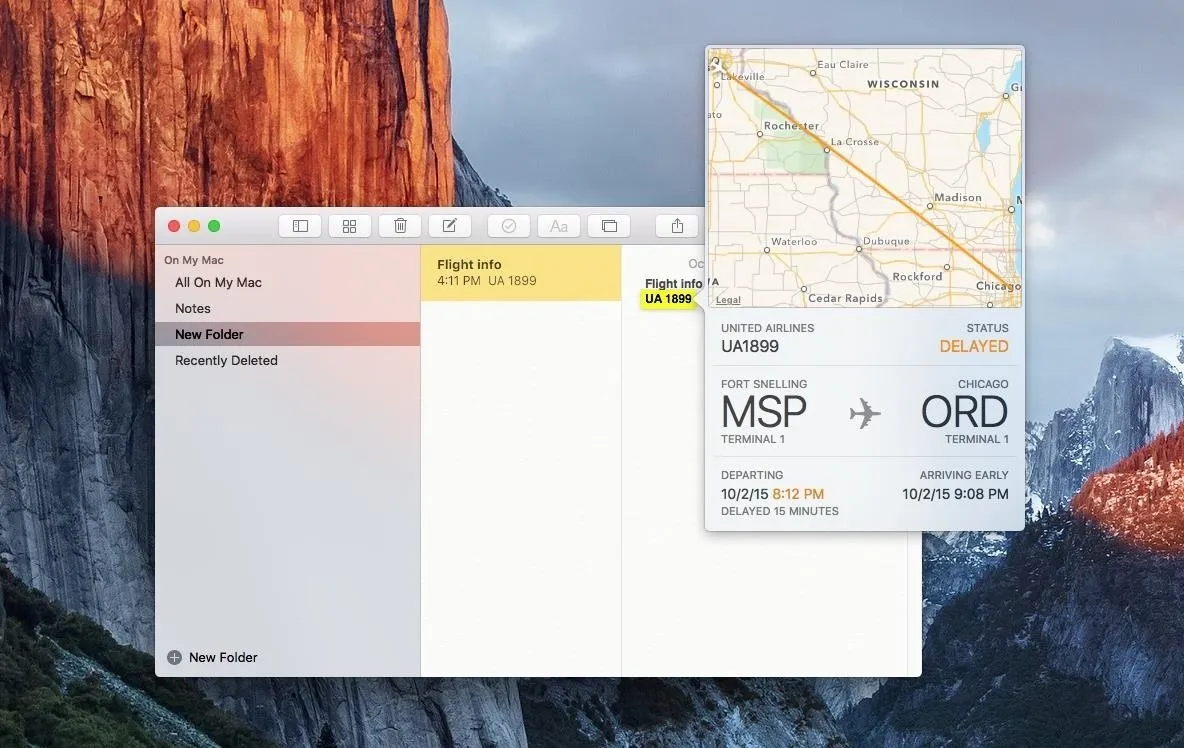
El Capitan detects flight information, so if you receive a flight number in Mail, Messages, or saved one in Notes, you can click on it and get up-to-date information.
We'll continue to update this roundup with lots of cool, hidden, and lesser-known tips and tricks for El Capitan, so stayed tuned.
Follow Apple Hacks over on Facebook and Twitter, or Gadget Hacks over on Facebook, Google+, and Twitter, for more Apple tips.



Comments
No Comments Exist
Be the first, drop a comment!