Macs, like pretty much all Apple products, are notorious for not having a highly customizable UI. They do this to keep a consistent look and feel across all of their devices, but I've grown bored of it over the years.
To help liven things up, Bhavin121 found a way to change the background image for the Mac OS X login window. Note that this is different than the password screen displayed after your Mac has woken up from sleep which, for the time being, cannot be changed.
This process is fairly simple and doesn't require any Terminal wizardry.
Before We Get Started
By default, whenever you change your Mac's desktop wallpaper, the login window's background changes as well. Unless you tweak your system, your login window's background will always be a slightly dimmed copy of your desktop wallpaper, with the addition of a blur effect.
In this guide, we will be replacing the blurred version of your wallpaper with a new image that will be displayed on the login window without any filter. Keep in mind that if you were to change your desktop's wallpaper afterward, the login window's will change as well, so you would need to redo this process in order to change it back.
Step 1: Locate the Default Login Window Image
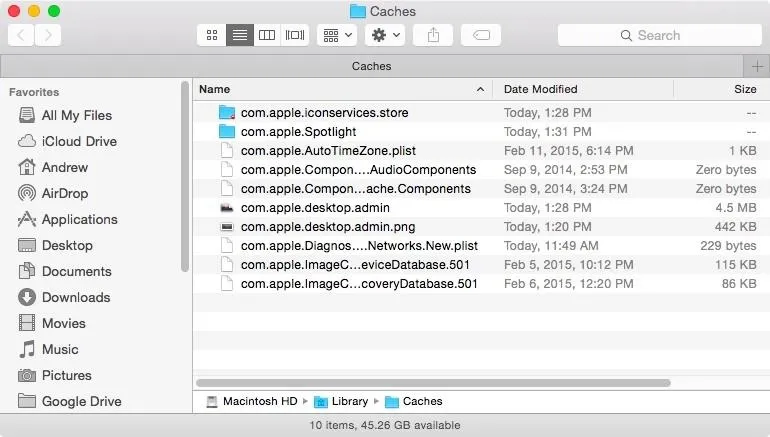
Before we get into choosing a new background image, let's find the default background image first, which is found in /Library/Caches. We'll need to know this later so we can swap it out with our new one.
To get to that folder easily, open up Finder, press Command Shift G, then enter the location of the Caches folder (your main system's Caches folder, not your user's).
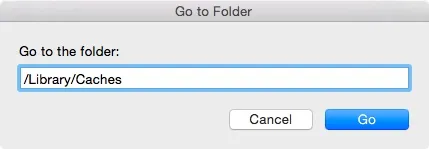
Once you are in the correct folder, find the image file labeled "com.apple.desktop.admin.png" and keep the Finder window open.
Step 2: Find Your Screen Resolution
Since the background has to cover the entirety of your login window, you must use an image that is either the same size or only slightly smaller. There are a number of ways to find out your resolution.
Method 1: Use the Default Login Window Image
If there are "Dimensions" listed under the "com.apple.desktop.admin.png" file using the Finder's column view, those are what you current screen size is. If not, you can quickly open the image in Preview, then press Command I to see the image's dimensions. My screen size is 1366 x 768.
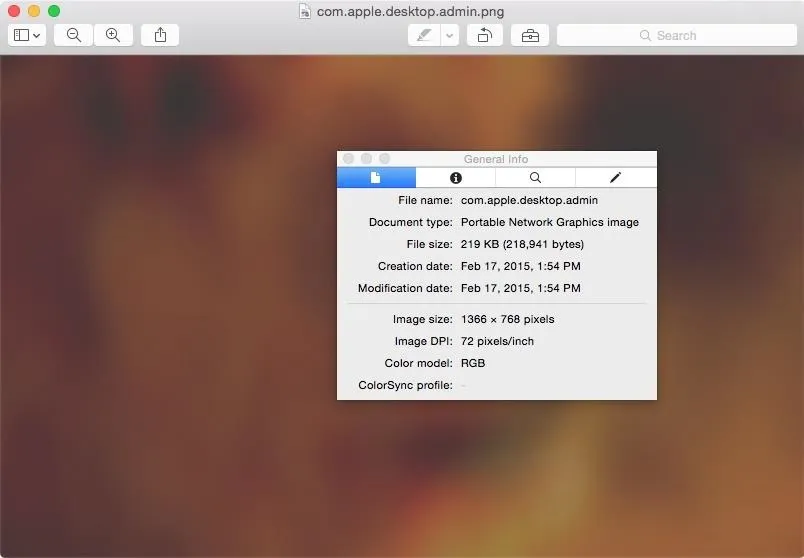
Method 2: Use System Preferences
Go to System Preferences -> Display and select "Scaled" resolution. The resolution highlighted at the top is your optimal screen dimensions, so use that as a baseline when finding a wallpaper. Again, mine is 1366 x 768.
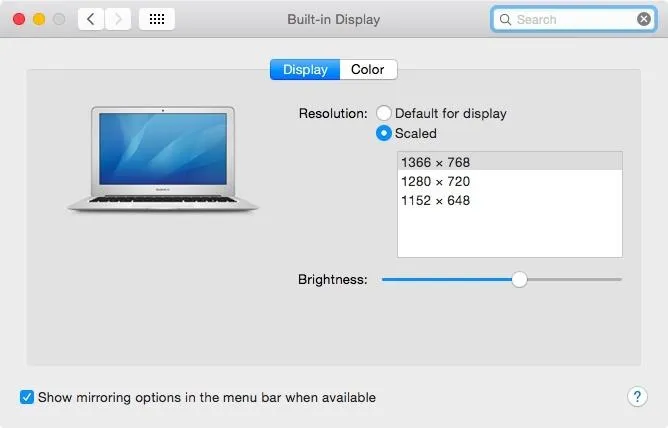
Step 3: Scale Your New Login Window Image
If you already have an image in mind, be sure to scale it to the correct size for your screen and make sure it's not too dark, since the background will be slightly dimmed on the login window.
To make things easier, just open the "com.apple.desktop.admin.png" file in the photo editor of your choice. In this case, I used Pixelmator. Once you have your old background opened as a new layer, copy your new image on top of it, then use a resize tool to scale it to the correct dimensions.
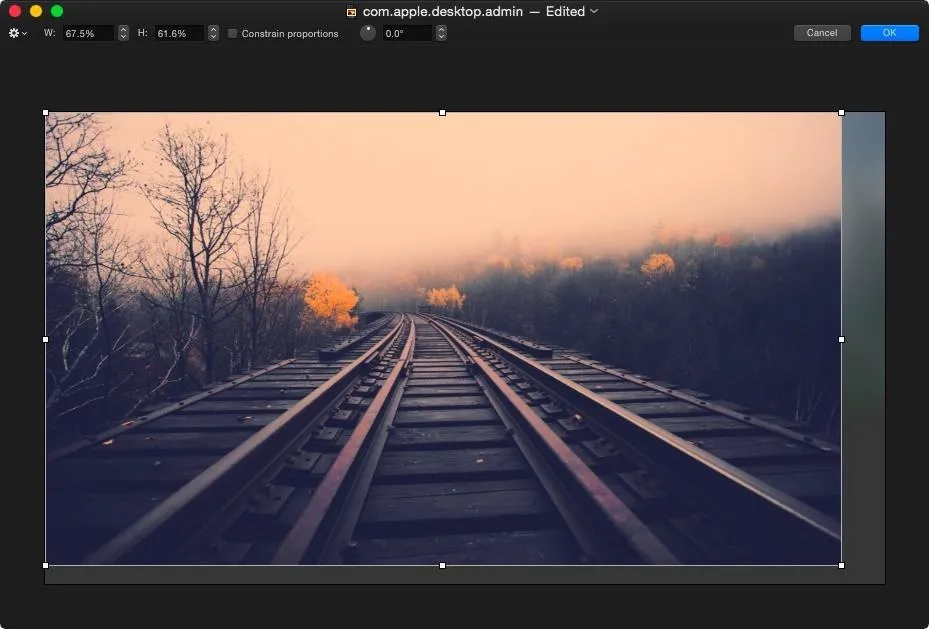
Step 4: Replace the Default Login Window Image
You should now have your new image scaled and ready. If you used the original login window image to scale your new image, simply save the edited image in Pixelmator (or whatever photo editor you used) overtop the original image.
If you're using a correctly sized background image that you found online, or one that you just scaled up yourself, simply rename the file to "com.apple.desktop.admin.png" and replace the original one stored in the /Library/Caches folder.
Step 5: See It in Action
Once the image is replaced, you can either logout, restart your computer, or select "Login Window" from the fast user switching menu at the top right of your screen (if enabled) to see your new login window background. Again, this will not change the authentication window when waking from sleep (if you require a password), just the login window.
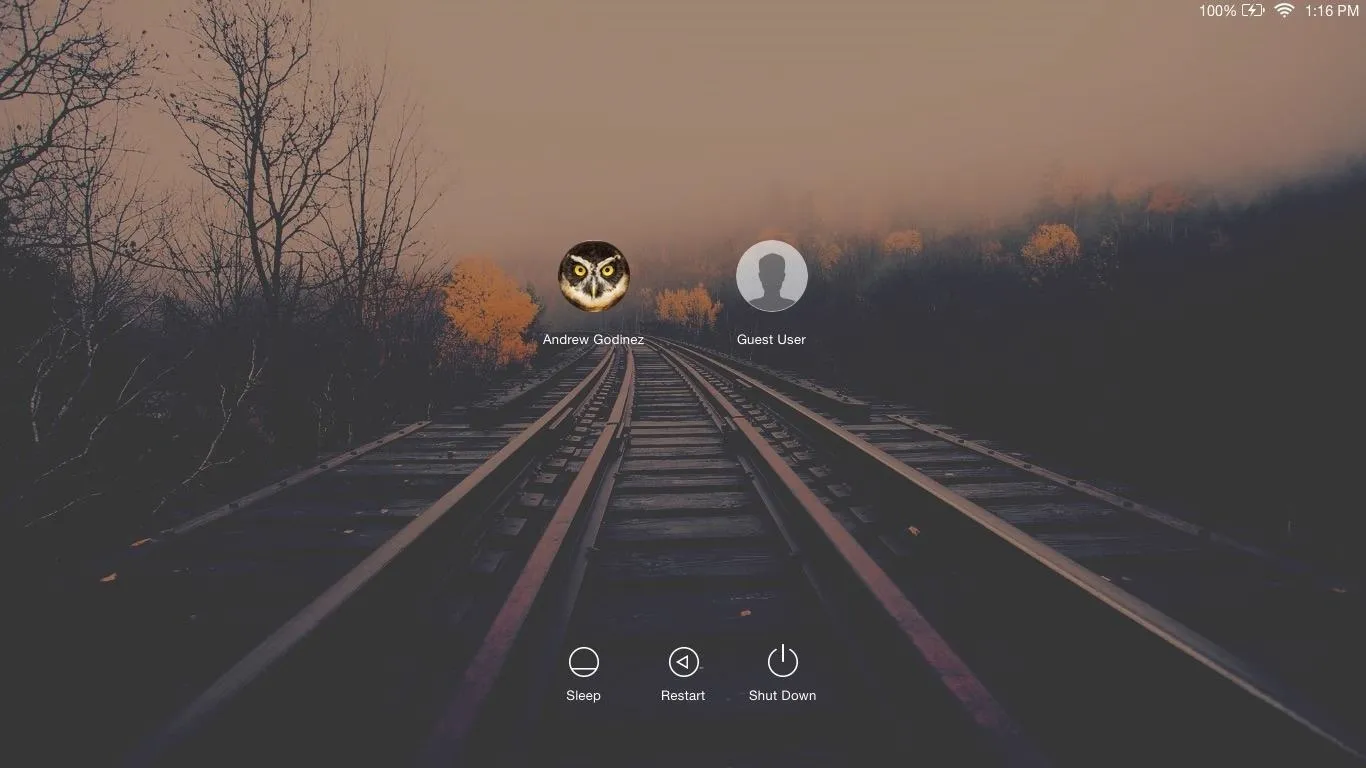
What does your new login window background look like? Let me know in the comments below, and make sure to follow Gadget Hacks over on Facebook, Google+, and Twitter for more cool Mac tips like this one.



Comments
No Comments Exist
Be the first, drop a comment!